
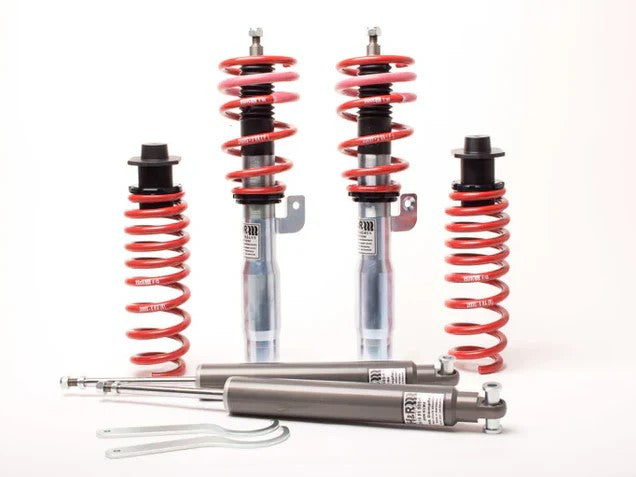
Buying a set of coilovers is the easy part. The difference between a car that rides like a brick and one that's genuinely better than stock is almost entirely in the setup. Bolt them on at the factory default settings and you've left most of the performance, and most of the comfort, on the table.
If you're still deciding between springs and coilovers in the first place, start with our lowering springs vs coilovers guide. If you've already got the coilovers in hand, here's how to actually dial them in.
What you can adjust
Depending on the kit, a set of coilovers gives you up to four things to play with:
- Ride height (every kit).
- Preload on the spring.
- Damping, often rebound and sometimes compression separately.
- Corner weight, by fine-tuning perch heights individually.
Get these in the right order and you'll end up with a car that sits right, handles flat and still survives a speed bump.
Step 1: Set your ride height
First, know which type of kit you have. Full-body (full-perch) coilovers let you set height at the lower mount independently of the spring, which is what you want, because it changes height without changing spring preload. Spring-seat adjustable kits raise and lower by winding the spring seat, which also changes preload, so you're trading one off against the other.
Set height evenly side to side. Measure from the centre of the wheel hub up to the guard (fender), not from the ground, because tyre and pressure differences will lie to you. After every adjustment, roll the car back and forth a few metres or bounce each corner to let the suspension settle before you measure, or your numbers will be off.
And don't chase the lowest possible stance. Going too low wrecks the geometry, the ride and the tyre wear, which we covered in detail in how low can you lower your car. Aim for a height that keeps proper suspension travel.
Step 2: Get preload right
Preload is how much the spring is compressed before the car's weight is even on it. The general starting point is the spring just seated with little to no preload (or whatever your manufacturer specifies). Too much preload and the suspension can effectively top out over bumps, giving you a harsh, skippy ride and less grip. On full-body kits, adjust height at the lower mount so you can leave preload where it should be instead of cranking the spring to get height.
Step 3: Dial in the damping
If your coilovers are adjustable, the damping clicks control how fast the suspension compresses and rebounds. Single-adjustable kits usually control rebound (or a combined setting); dual-adjustable split compression and rebound.
Start at the manufacturer's recommended baseline, often around the middle of the range, then tune from there:
- Stiffer (more clicks toward firm): sharper turn-in and less body roll, but a harsher ride and, on rough surfaces, less grip because the tyre struggles to follow the road.
- Softer: more comfort and often more mechanical grip on bumpy or wet roads, with a bit more body movement.
Set both sides to the same setting, and tune on the roads or track you actually drive. The trap is setting them rock hard in the driveway because it feels "sporty", then hating the car on a real road.
Step 4: Corner balancing (the next level)
Corner balancing, or corner weighting, means adjusting each corner's perch height so the diagonal weights of the car are even. The number that matters is cross-weight, ideally close to 50 percent, so the car behaves the same turning left as it does turning right. This is mostly a track and serious-handling exercise, not something every street car needs, but it's where a properly set up car pulls ahead.
It has to be done on corner-weight scales on a dead-level floor, with the car at its real driving weight: full fluids, the fuel level you'll run, correct tyre pressures, and a weight in the driver's seat to simulate you. Because changing a corner's height shifts the weight, ride height and corner balance interact, so you iterate between the two until both are right. This is the one step worth handing to a workshop with the gear unless you've got scales yourself.
Step 5: Get a wheel alignment (non-negotiable)
Any time you change ride height, you change your camber and toe. Drive on the new height without an alignment and you'll chew the inside edges off your tyres in weeks and the car will feel vague or darty. Book an alignment as the final step after the height is set, and if you've corner balanced, do the alignment after that. Tell the aligner your intended use so they set sensible figures rather than just factory specs.
Final checks
- Make sure all locking collars and perches are tightened so nothing winds itself loose.
- Torque the top mounts and hardware to spec.
- Re-check ride height and listen for knocks after the first few hundred kilometres, as everything settles in.
Common mistakes to avoid
- Using spring preload to gain height and ending up with a harsh, topped-out ride.
- Uneven settings or heights side to side, which makes the car pull and handle inconsistently.
- Skipping the alignment and destroying a set of tyres.
- Going as low as the kit allows instead of as low as the car can actually work.
The bottom line
Coilovers reward the time you put into setting them up. Get the height sensible and even, leave preload alone on a full-body kit, tune damping on real roads, corner balance if you're chasing serious handling, and always finish with an alignment. Do that and you'll have a car that's sharper and more livable than stock.
Browse our suspension range from H&R to find springs and coilovers for your build. Not confident setting them up yourself? Suspension is a safety-critical system, so there's no shame in having a workshop install, corner balance and align it. Get in touch with the team and we'll help you choose the right kit for how you actually drive.


